
Woodworking takes time! It’s not something that can be rushed or perfected on the first try. It requires practice and learning from your mistakes. In the end, you end up with a beautifully crafted object that you can call your own.
The experience of creating something out of nothing is extremely rewarding.
The experience of creating something out of nothing is extremely rewarding. That’s also one of the reasons whyI love computer science. The fact that I can create something that can reach millions of users.
I began my journey into woodworking a few days before my sister’s birthday. As I tend to do with most birthdays, I start thinking of what gift to get a couple days before hand. My sister recently started getting interested in the startup culture and began watching Silicon Valley. When you combine these interests together, you get your sister a 1 month subscription to HBO… hiding the fact that it was just a free trial. 😜
Only joking! This is where the three commas (, , ,) come in…

Three Commas Club (THrē ˈkäməs kləb)
Three commas to imply a billion dollars as $1,000,000,000 has 3 commas. To be in the three commas club is to be a billionaire. [source]
I wanted to get her something that represents the three comma club, pushing her to achieve her entrepreneur focused goals. While there are many t-shirts and paintings of three commas, I set out create them out of wood. Something that can be placed on her desk of her future unicorn. 🦄
It’s Woodworking Time!

Sketch It Out
When you get started, you have to have a sketch. Whether it’s on a napkin or a sheet of paper, get your ideas down in some physical form. It’s difficult to create something from scratch when it’s just in your head.
The same can be said for software engineering. You have to create a rough architecture diagram so you have a reference point.
I started by sketching on a sheet of paper and moved on to creating a digital version of it:

Drawing a large comma on a sheet of paper is actually harder than I thought. It was easier to create a digital version of the sketch since I could work off a preexisting image of a comma.
I used Sketch to design my digital commas and worked off of an image from TheNounProject.
Technically yes, the sketch above would not be physically possible due to the center of gravity being located towards the right. The comma would just fall/roll over on it’s side. I ended up using a different edge for the base in my final designs. However this was still an issue and had to update my designs to take that into account. (will get into this later)
My Setup
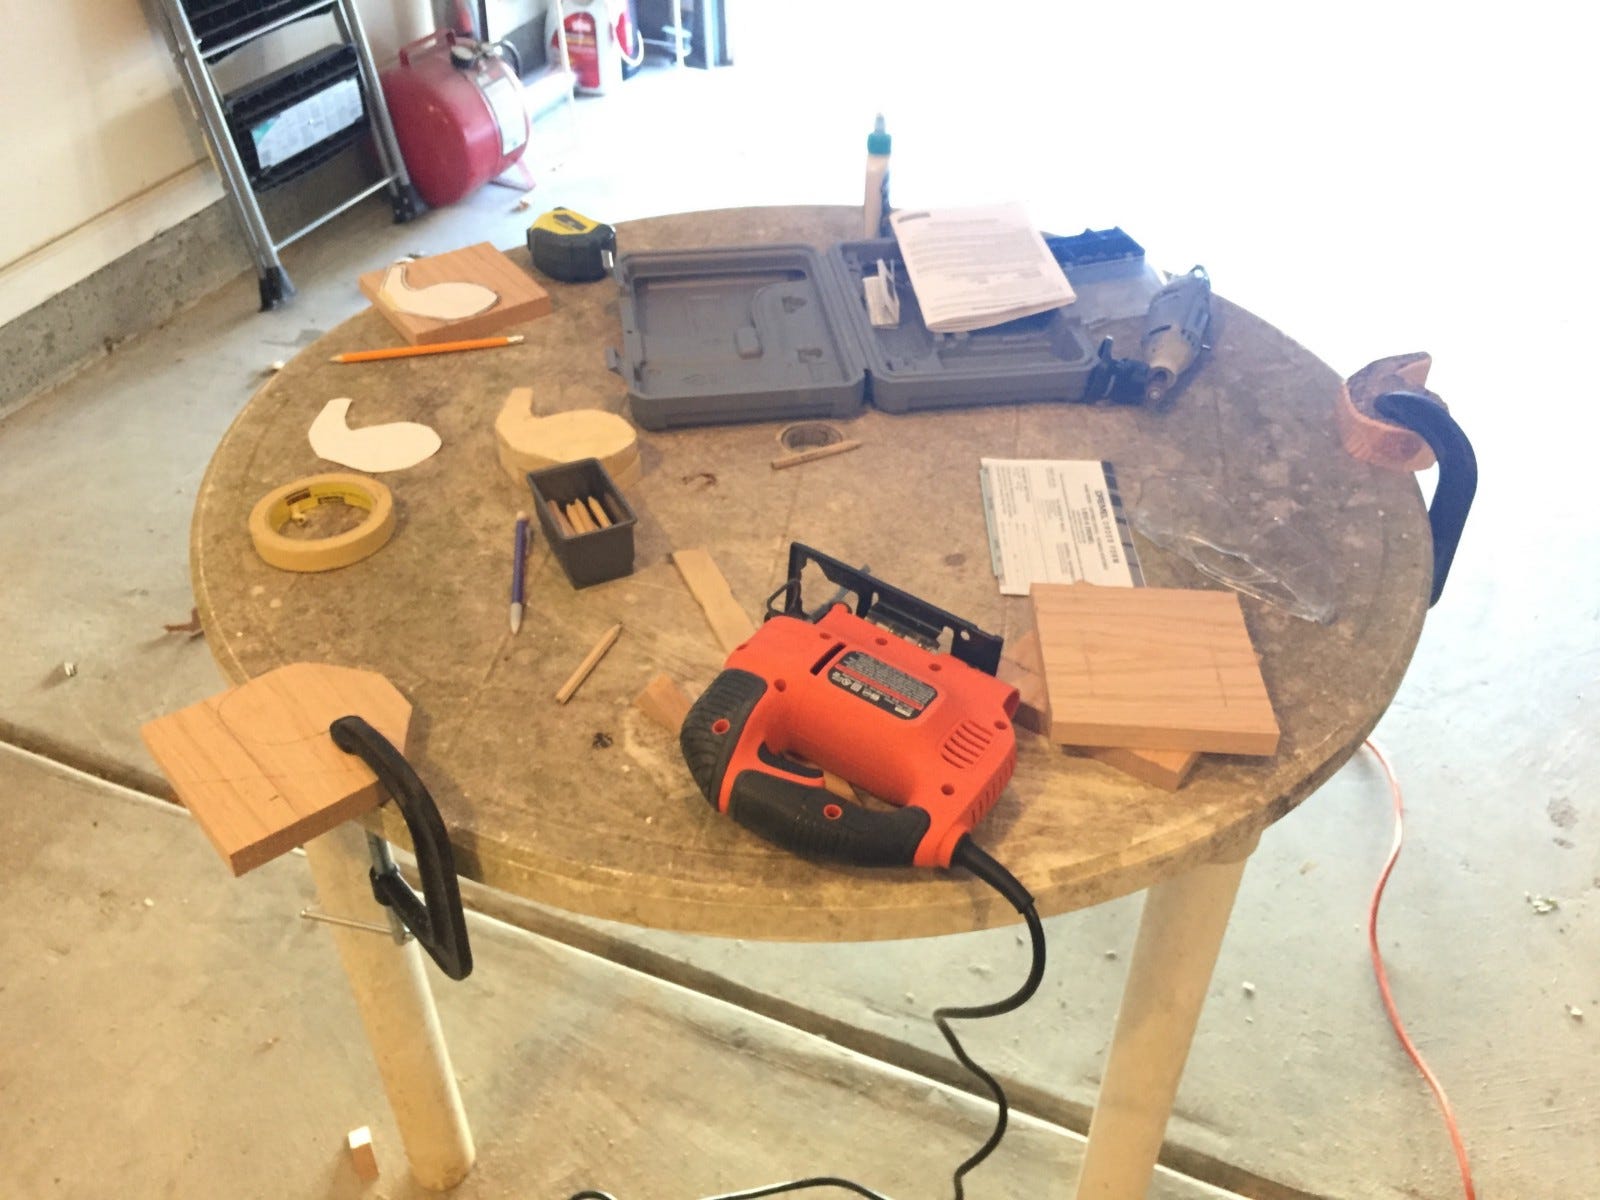
Unfortunately I did not have an official wood working table. I ended up using an old plastic picnic table. It was not ideal but it got the job done.
Initial Tools & Materials
Also, if you are me, you have almost zero materials for working with wood. There’s many different opinions on how to get started but this is what I did.
I bought a cheap jigsaw ($30), two clamps, and sandpaper (60, 120, 220 grit). I already had an extra table to work on but make sure you have a good flat surface where you can easily clamp your wood to.
If I had known about jigsaw blades earlier, I would have bought a separate set of jigsaw blades when started this project. Not all blades are alike. Some blades are good for curved cuts, others are good for smooth cuts, and etc. The jigsaw comes with a default blade.. which gets the job done. However the blade specifically for curved cuts was phenomenal. It was easier to direct the jigsaw around curves and it usually came out with a smoother finish.
I’ll have information about what materials and tools I used scattered throughout this post. To see a complete list and additional details, scroll to the end.
Start with Practice Wood
If you have never worked with wood before, get some practice wood from Home Depot or Lowes. I started out with a 2in x 4in x 8ft block of pine wood ($5).
Pine wood is extremely easy to work with since its soft wood that can be easily shaped. It also helps that its extremely cheap. Check out this site for more information on pine and other kinds of wood: link.
Initial Cuts
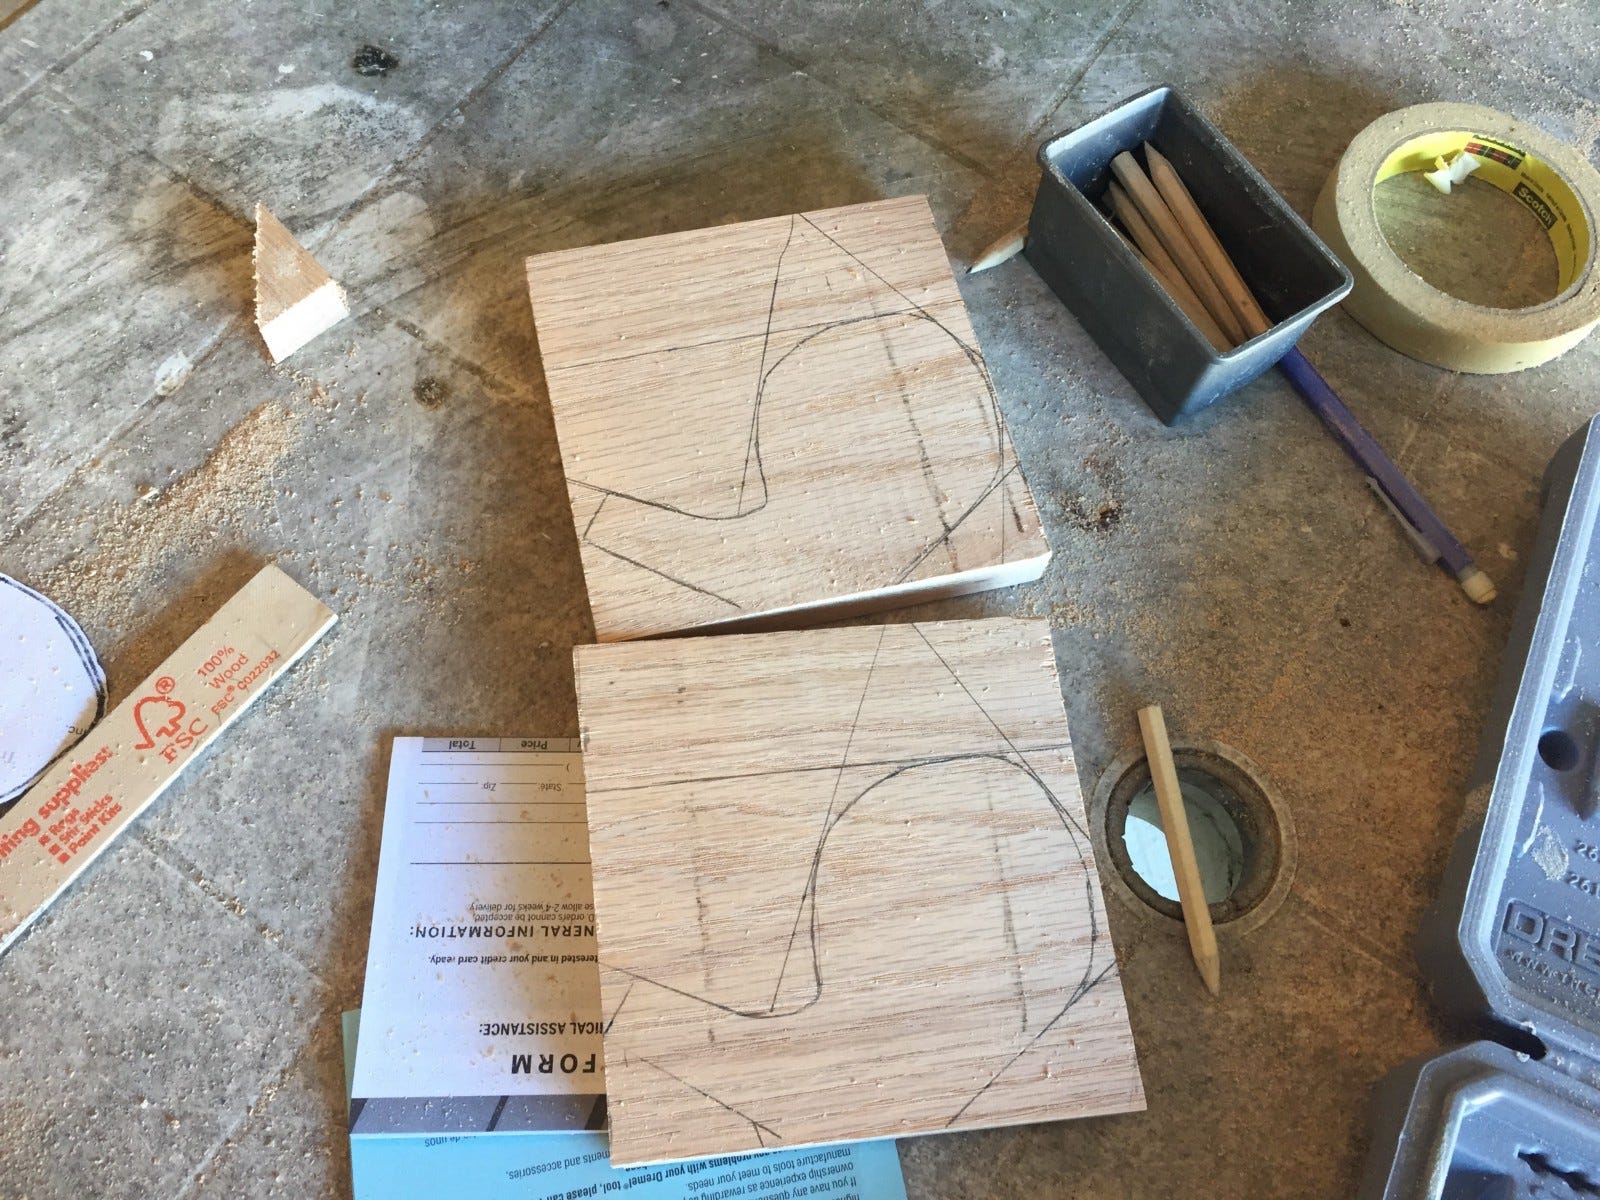
Begin by drawing an outline of your designs on the wood. Preferably with a pencil. Unfortunately, I lacked the insight and used a sharpie :/
Use the jigsaw to make rough straight cuts. Going in straight lines made it easier than going around curves. I made many passes and continue shaping down to the outline over each cut.
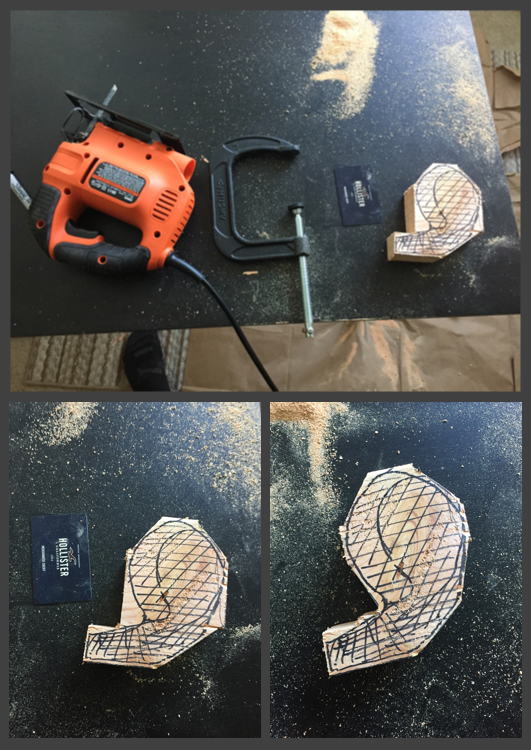
As you can see above the cuts are very rough. However it is possible to get somewhat of a finished look if you can work carefully with a jigsaw. The blades made for doing curved cuts will help a lot towards getting that finished look. Which is what I ended up using for my final pieces.
Try to get a hang of the jigsaw when using your practice wood. Also sand it down with sandpaper and the dremel to get a feel for the tools & materials. You want to have a good idea of how to cut with a jigsaw and sand with a dremel before you move on to your real wood.
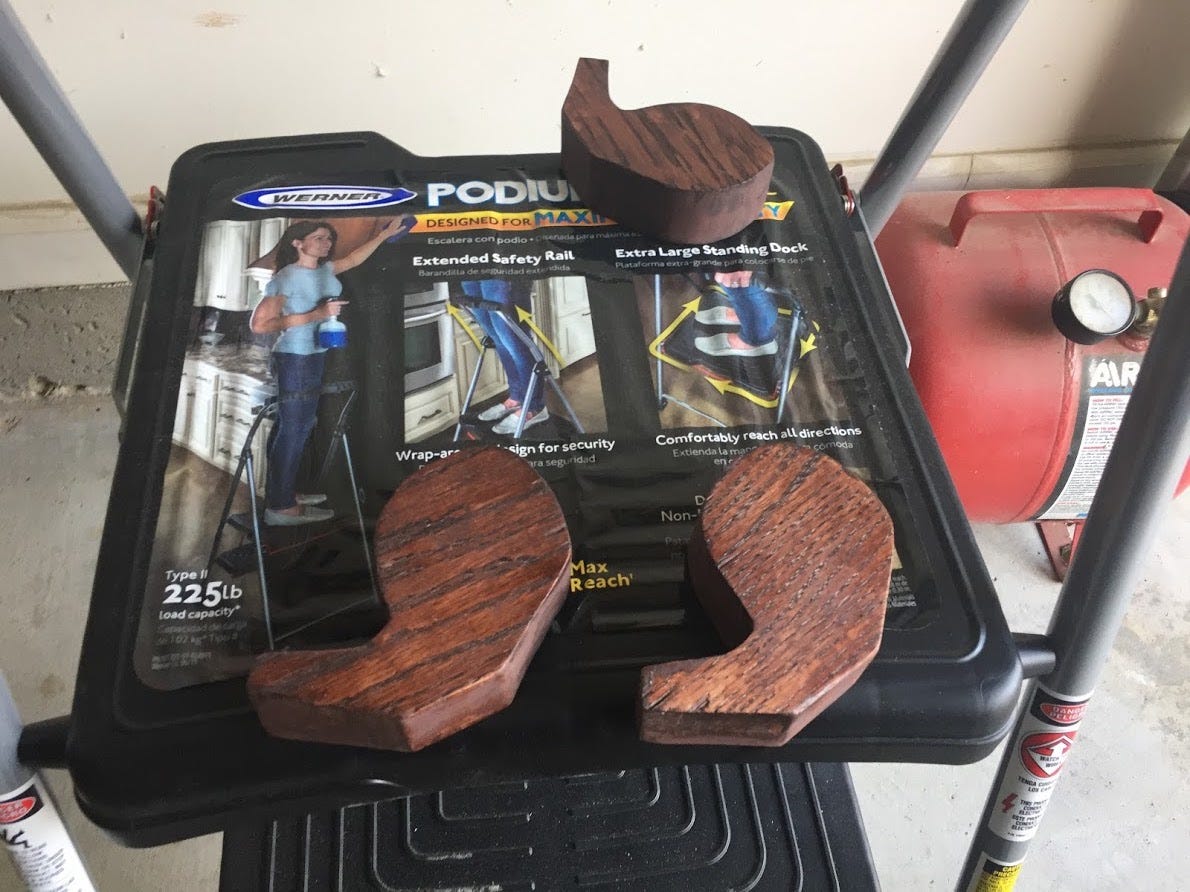
Creating the Commas
After I had gotten a hang of the tools on pine wood, I moved on creating to creating my commas out of oak. I used oak because it was an easy to work with hard wood that has a more premium look to it. I also wanted it to be stained and not painted.
Unfortunately the oak did not come in 2in thick wood, which is how thick I wanted my commas to be. So I ended up using two 1in pieces and glueing them together.
As I did with pine wood, I started off outlining the designs on the wood. Again, do not eye ball this as a beginner, these are your reference points.
Entire Cutting Process
Just to understand the entire cutting process, this is what it looked like from start to finish.
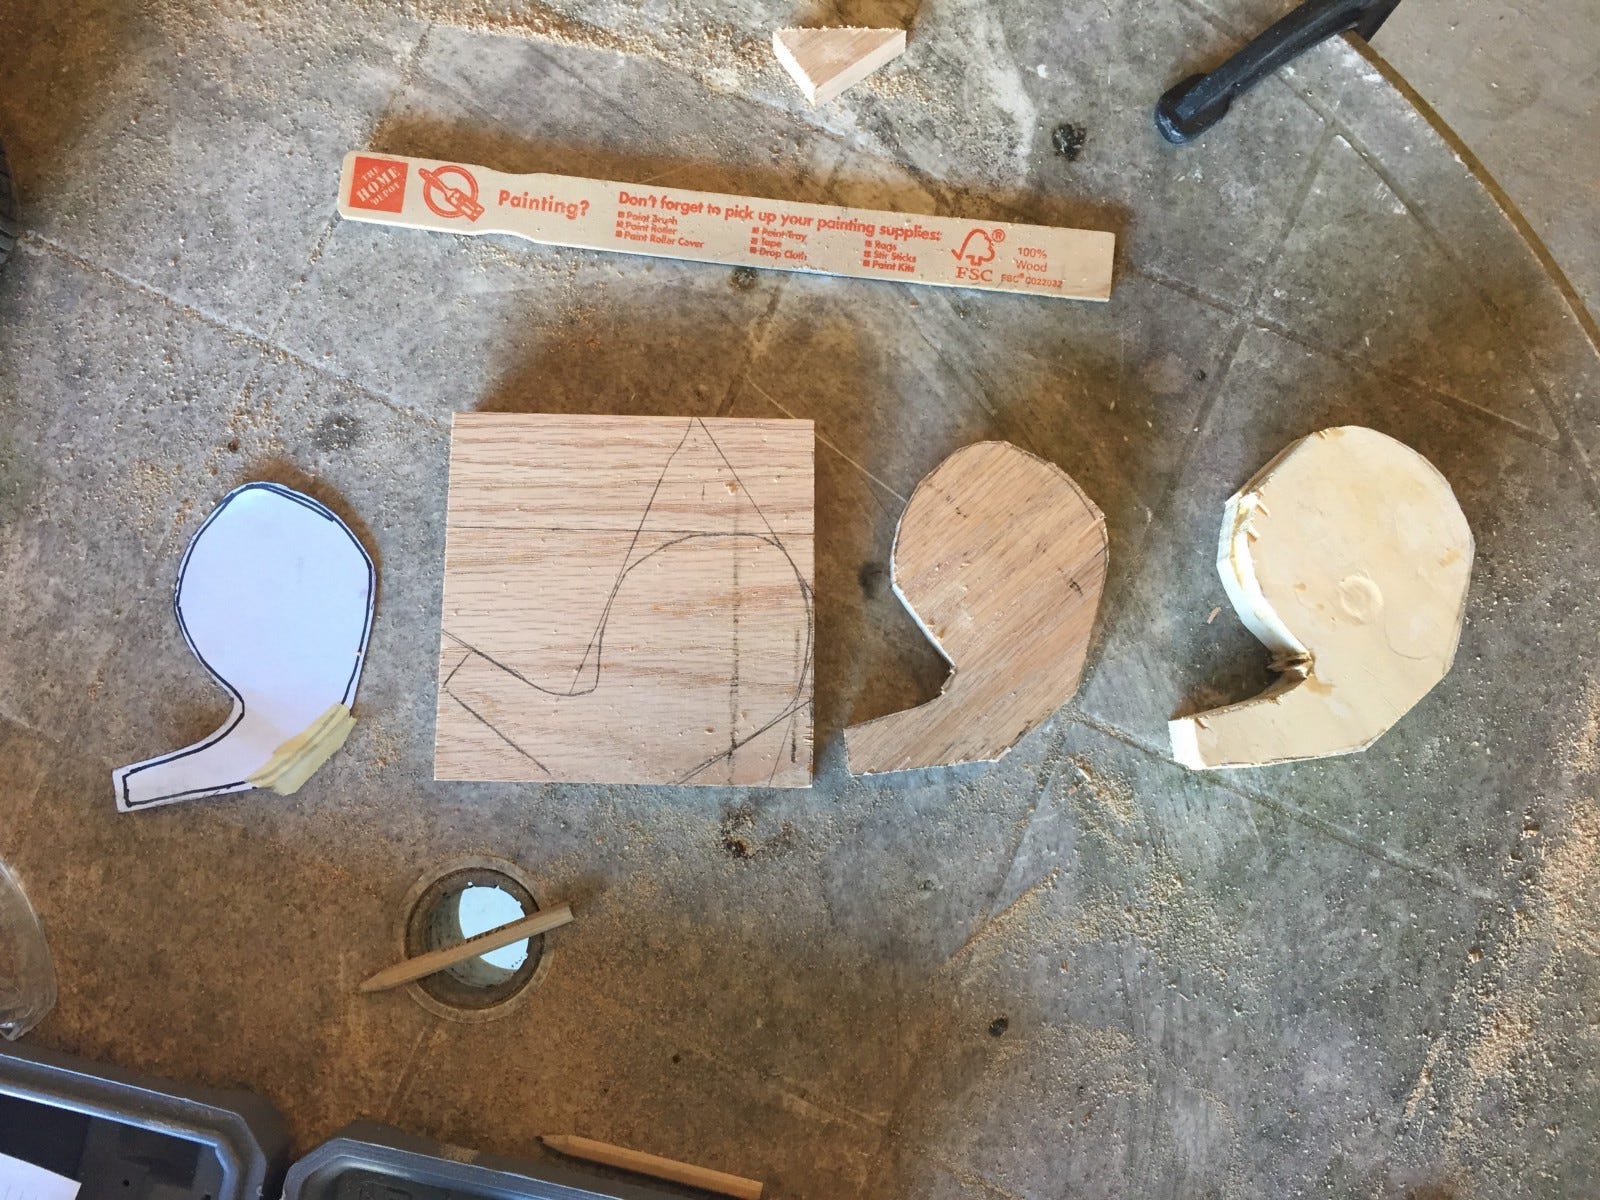
- Creating the sketch
- Drawing the outline
- Cutting along the outline
- Glueing two pieces together
Glueing
After cutting each comma piece, I applied wood glue on both of the pieces and clamped two of them together. I believe the wood glue says to wait for 60 mins but I left it for a few hours.
Make sure the glue comes out the sides and wipe it clean. This way you have a clean edge and no gaps between the two commas. However, do not fret if there are gaps, you can use wood filler to fill it in.
After glueing them together, I had to use the jigsaw again to get the two pieces flat and lined up properly.
Sanding
After cutting/glueing, I sanded down the wood. However I wished I had sanded after I applied the wood filler. Mainly because I had to sand another time.
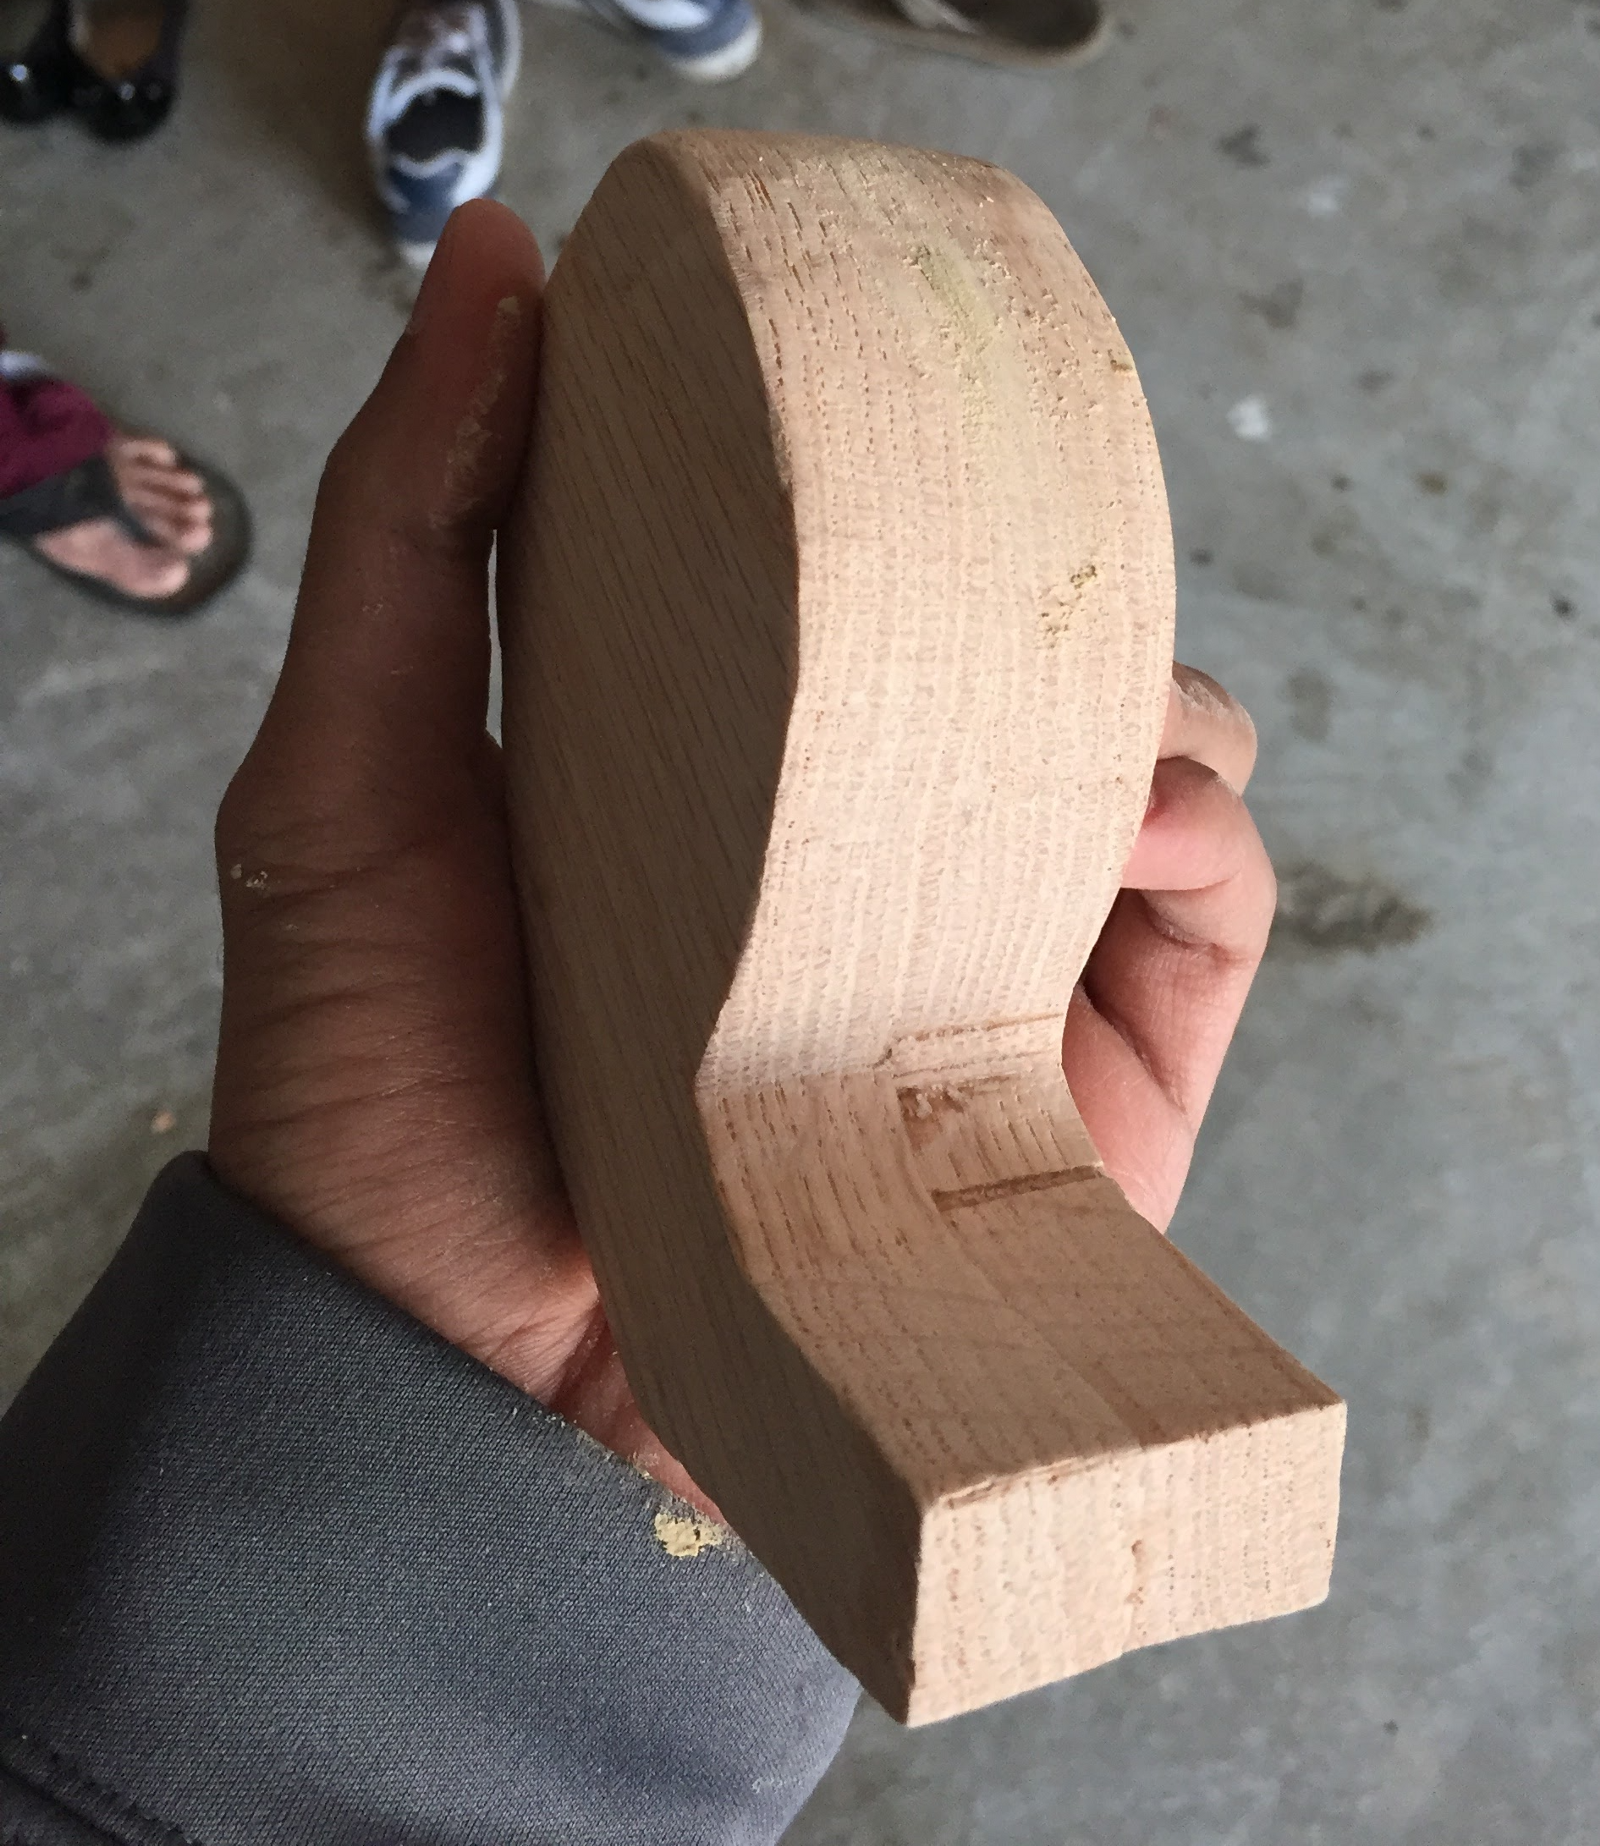
When sanding, start from an extremely coarse sandpaper (60 grit), then move on to finer sandpaper. So I sanded the commas with 60 grit, then moved to 120 grit, and then finished with 220 grit.
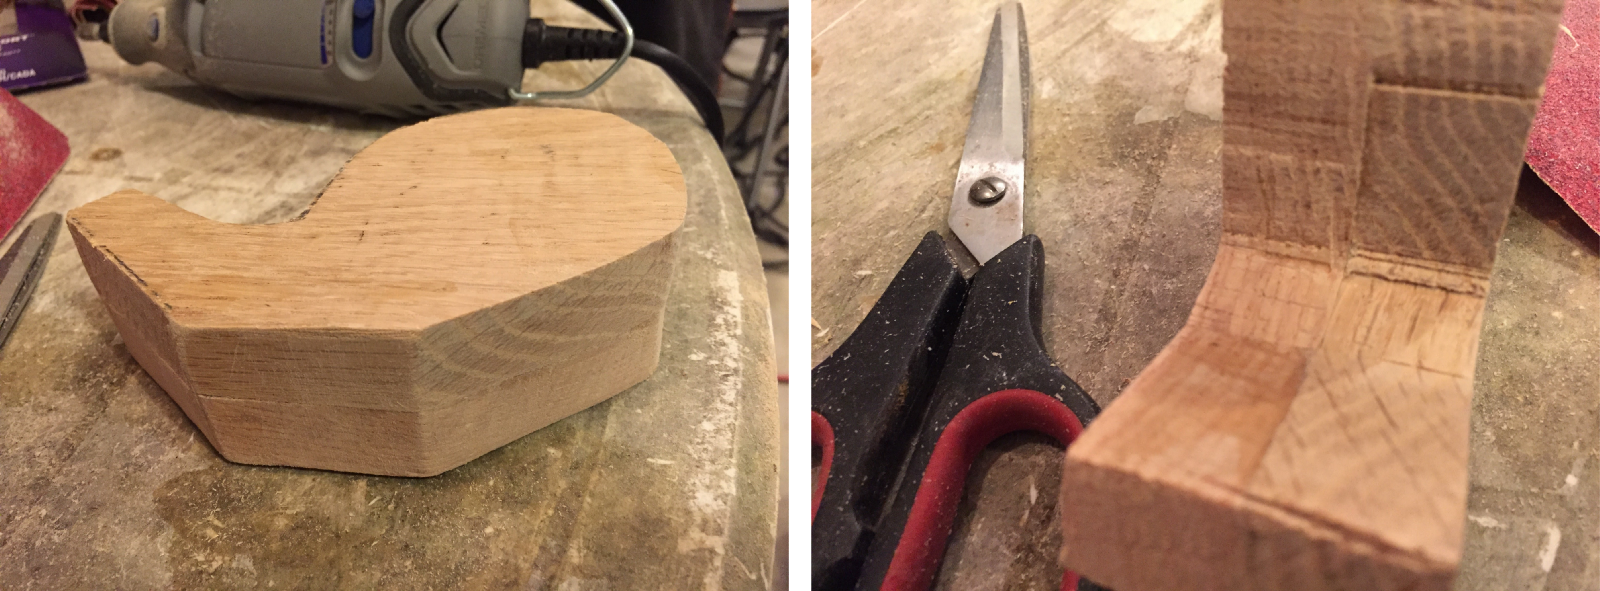
I thought I could sand with the dremel but I did not realize the dremel was for sanding smaller areas and touching up finer details. I ended up sanding by hand and finishing with the dremel. The dremel was used to sand the inside curves of the commas as that was not easy to do by hand. However, you could buy belt/disk/orbital sanders to sand larger pieces.
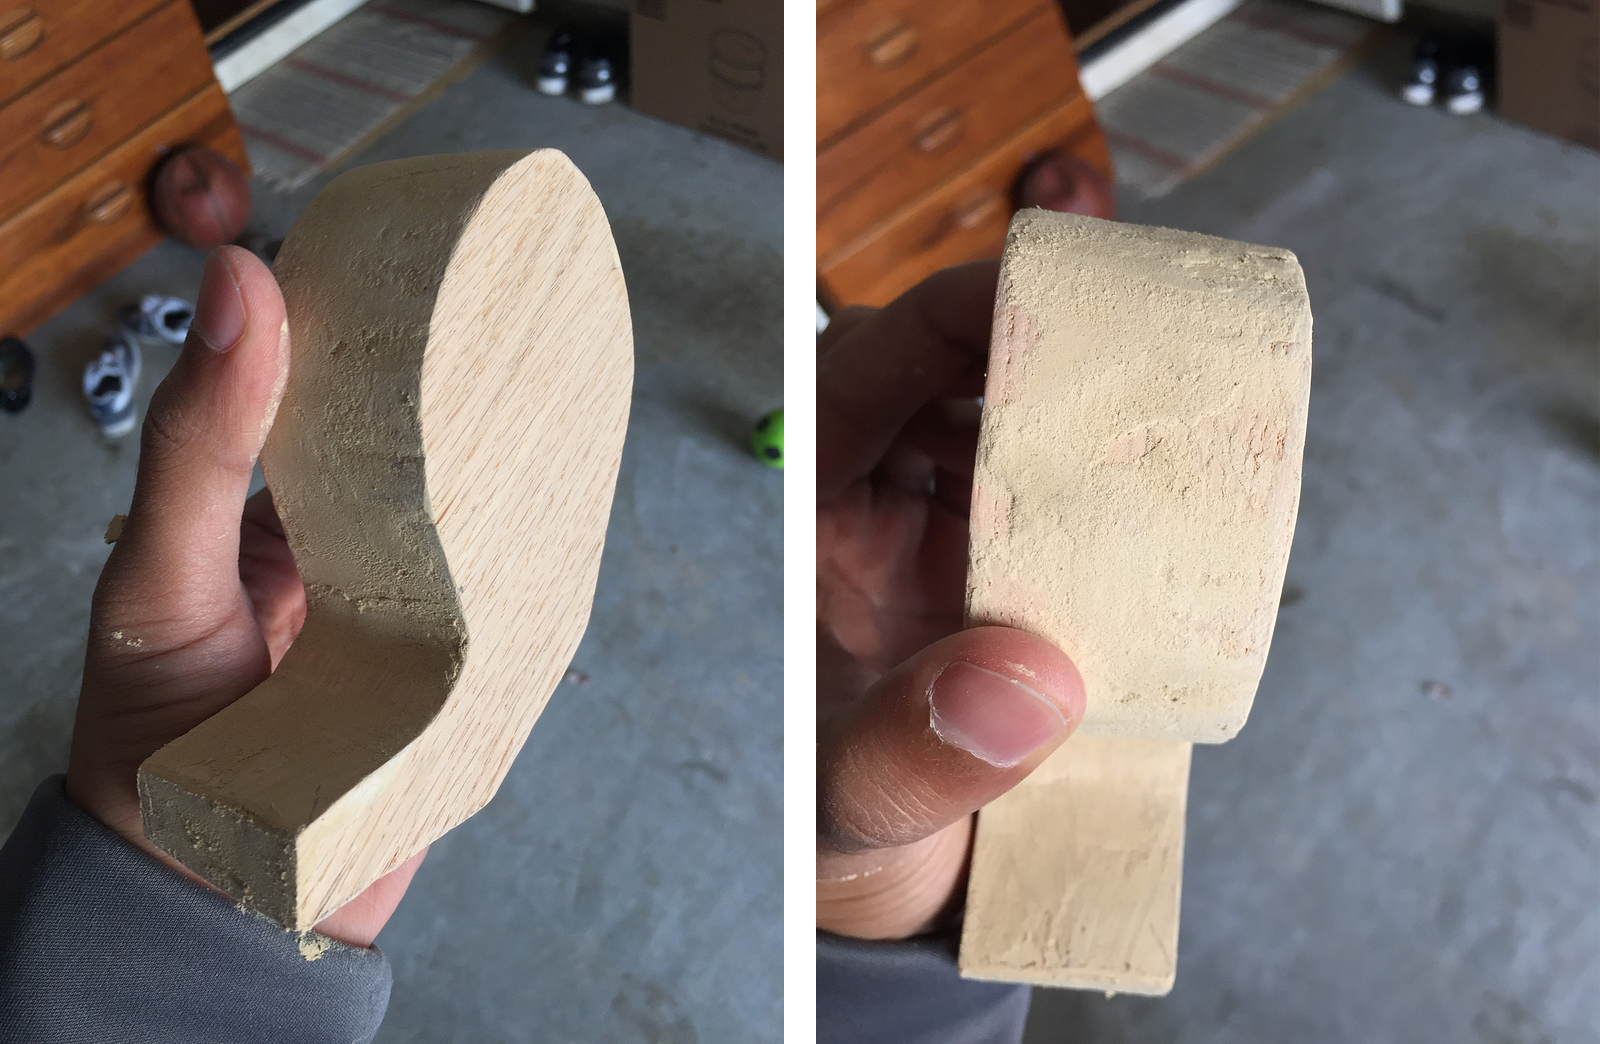
Touching Up
As I said, I used wood filler to fill in any gaps between the wood and any mistakes that happened while cutting. The specific filler I used was Plastic Wood 3 oz. Natural Latex Carpenter’s Wood Filler.
It does look a little rough, however you can sand it down after it dries. In addition, if you get the natural colored filler, you can also stain right on top of it.
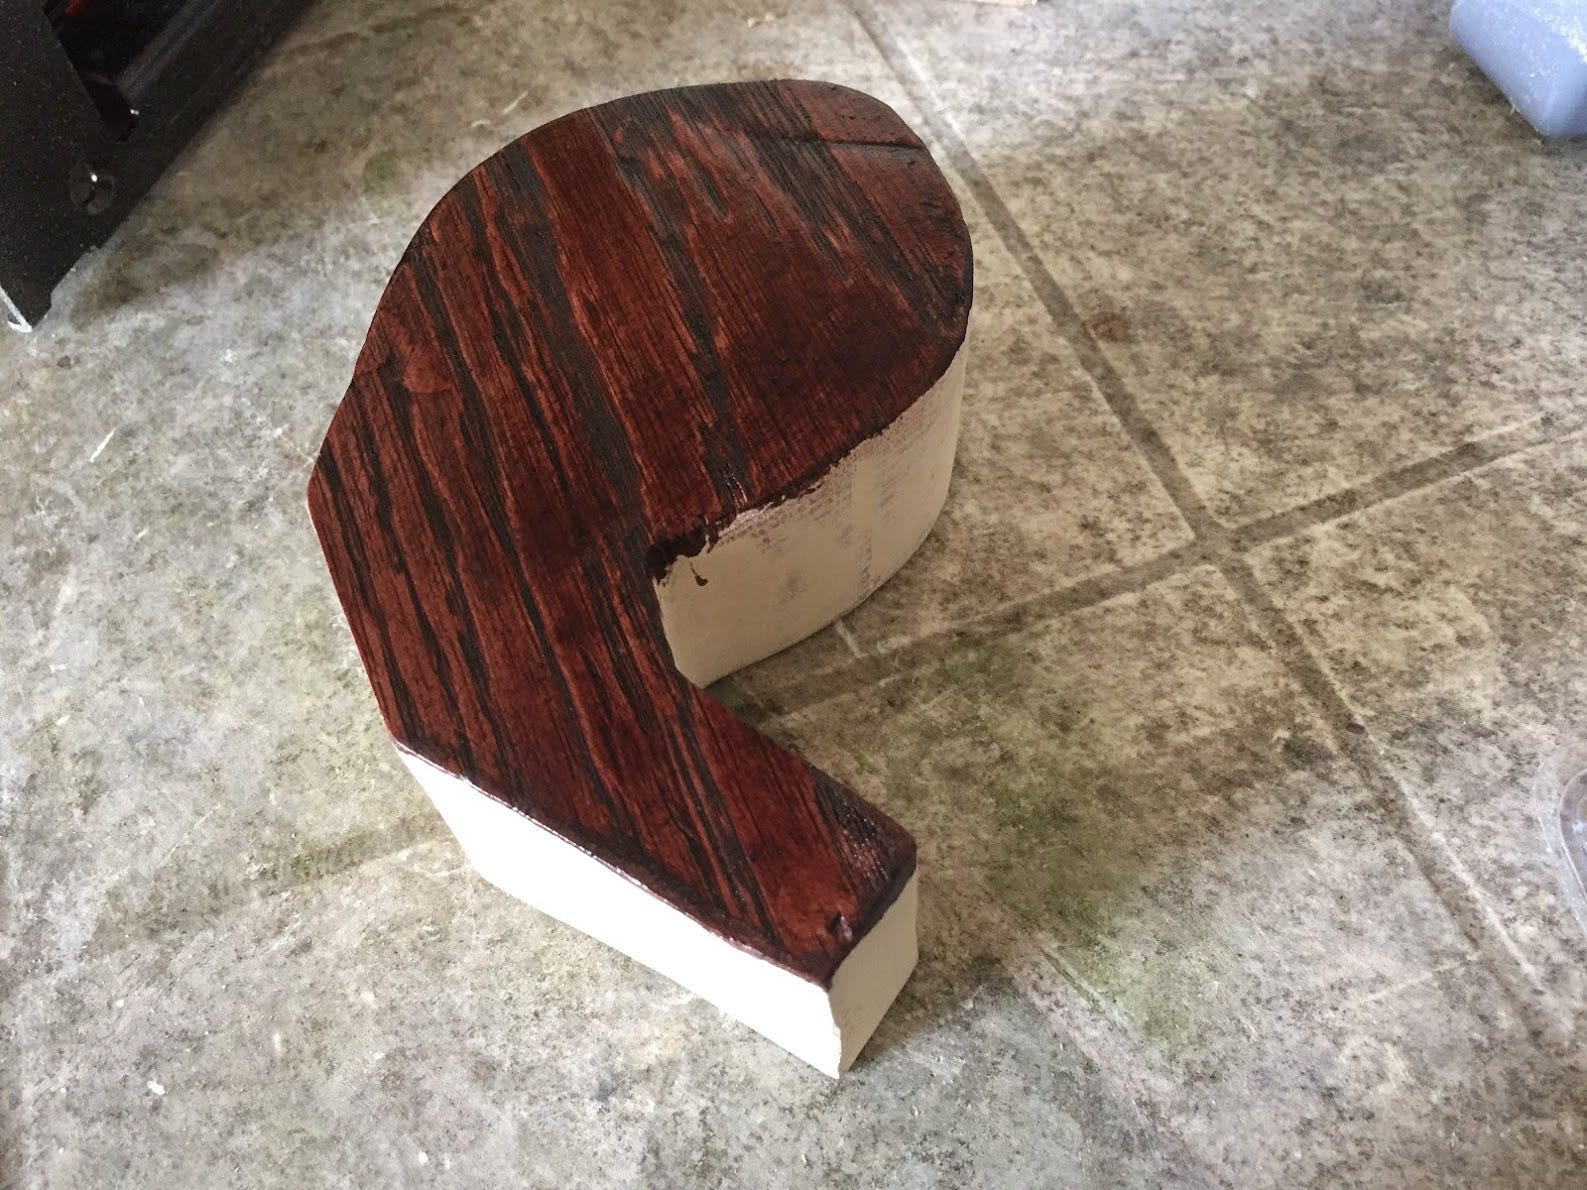
Staining Wood
I chose to stain the wood instead of painting it. Mainly because I wanted the wood grains to show.
I used Red Mahogany Wood Stain.When picking out a wood stain, make sure to ask to see the stain samples. You can get a good idea for how the color dries on wood.

I cut up an old white cotton t-shirt and used that to stain the wood. I won’t go into how to stain the wood as the instructions are right on the can. Just make sure to be in an well ventilated area as the smell is pretty strong.
This took the longest as I had to stain each side and wait for it to dry a couple hours before I could apply another coat.
Staining Wood (Problems)
Unfortunately some of my wood stain dried in blotches/patches. See below.
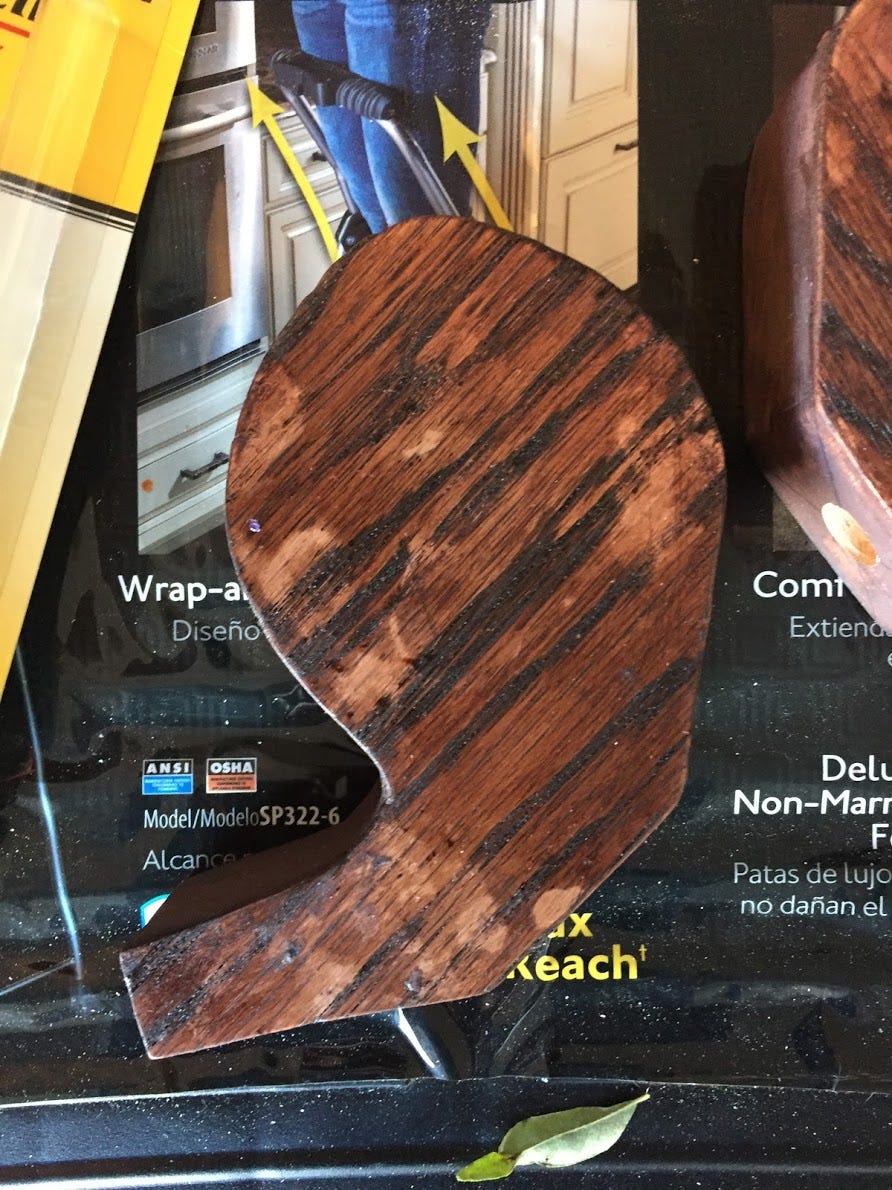
I could never figure out why this actually happened but I do have one theory. The instructions on the can state that you should apply the stain, wait for it to soak in for a few mins and then wipe of the stain completely. Maybe I had applied or wiped off the stain unevenly. With this theory in mind, I tried staining only the blotched areas again but that did not do anything.
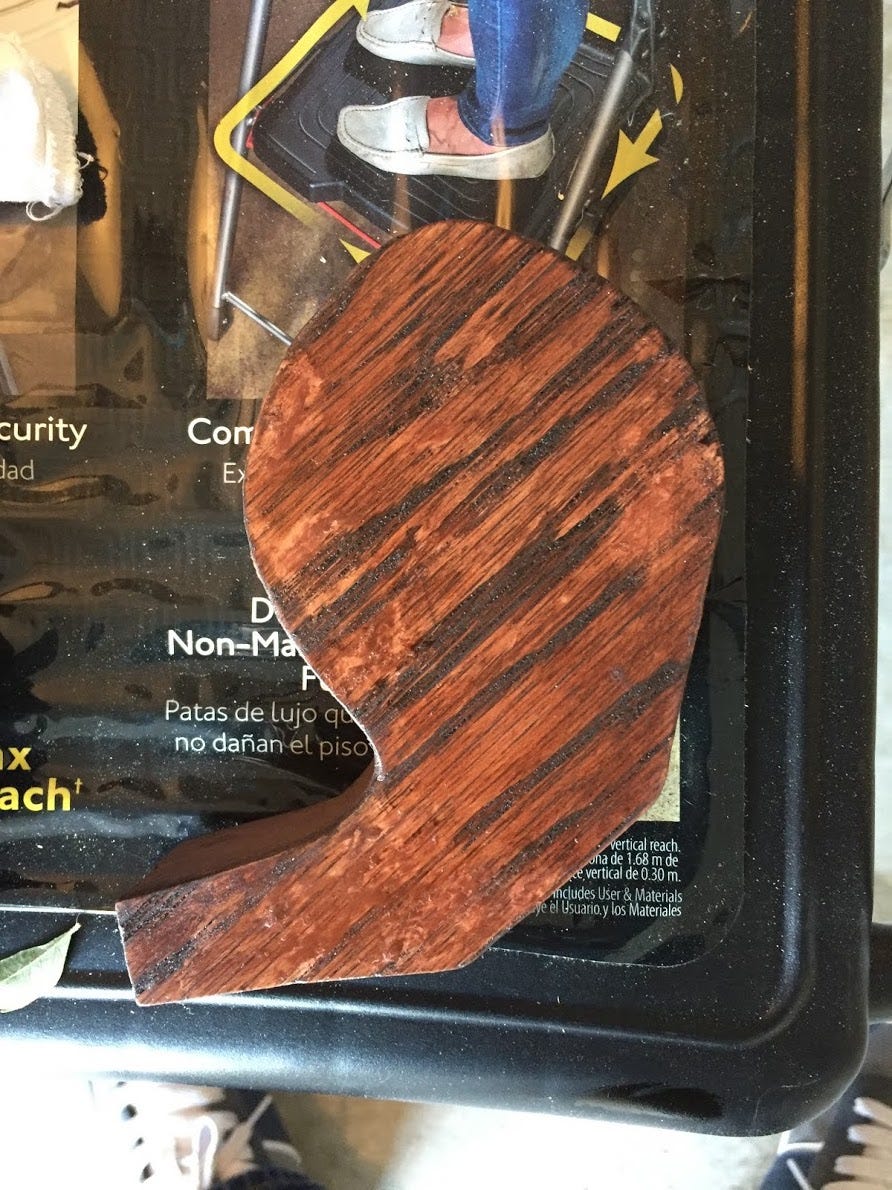
A suggestion from the Home Depot associate was to use pre wood stain conditioner as this would allow for wood to be stained evenly at all times. However this required sanding/removing the current stain and then re-staining.
Unfortunately I did not have enough time to do that, so I ended up using a Red Mahogany Blend-Fil Pencil to fill in the blotched areas. Ideally, these should be used for touchups. They do not work well for large areas. In my case, the blotches still existed but the pencil made it less noticeable.
TK(wood-stain-blotches-1-img and woodstain-blotches-fixed-img)

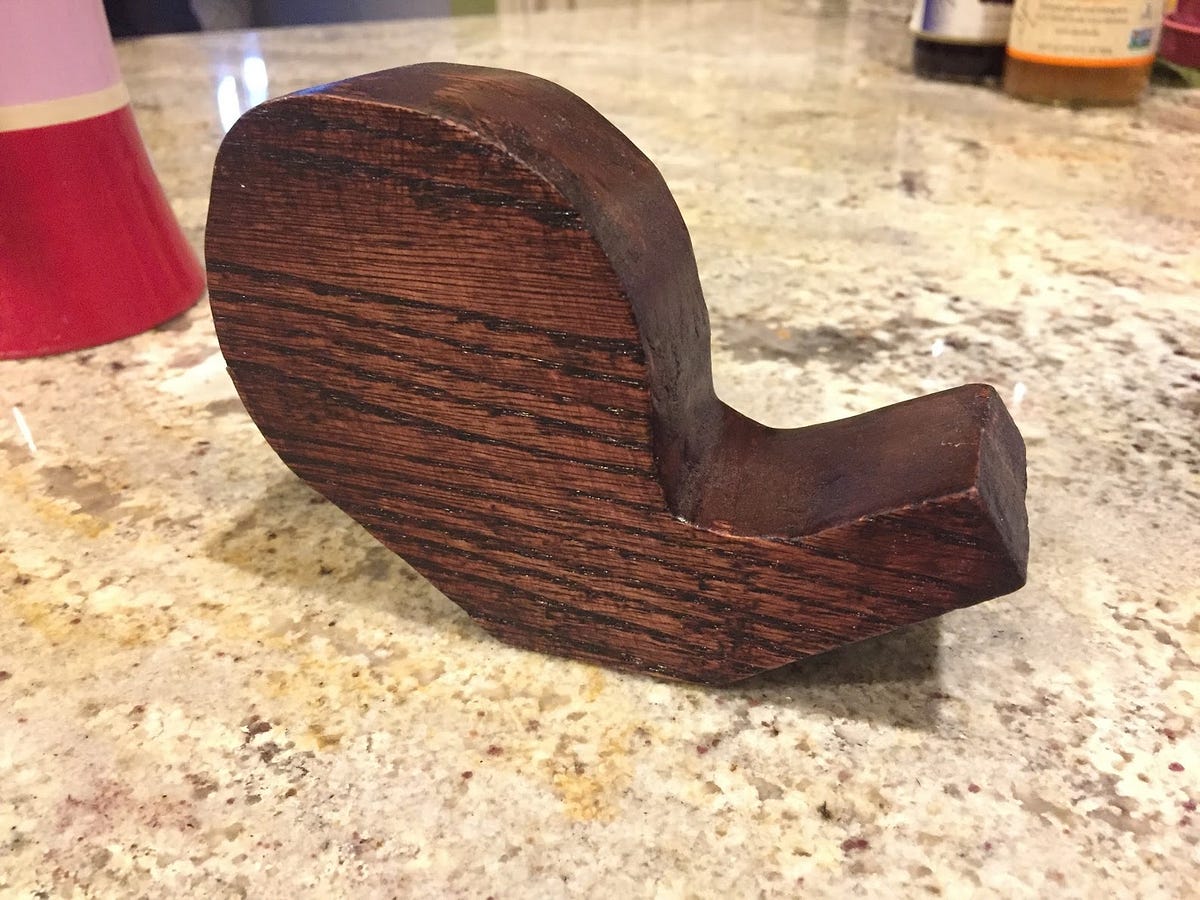
Top Coat
After the stain had dried, I applied a topcoat (polyurethane, semi gloss) for a layer of protection and gloss. The stain layer also felt a little unfinished so the topcoat helped give a more smoother feeling to the commas.
Building the Base
I used some extra oak wood that I had to build the base. The base was pretty straightforward; it’s a plain block of wood. I wanted to add some depth to it so I used the router bit on the dremel on the edges of the wood.
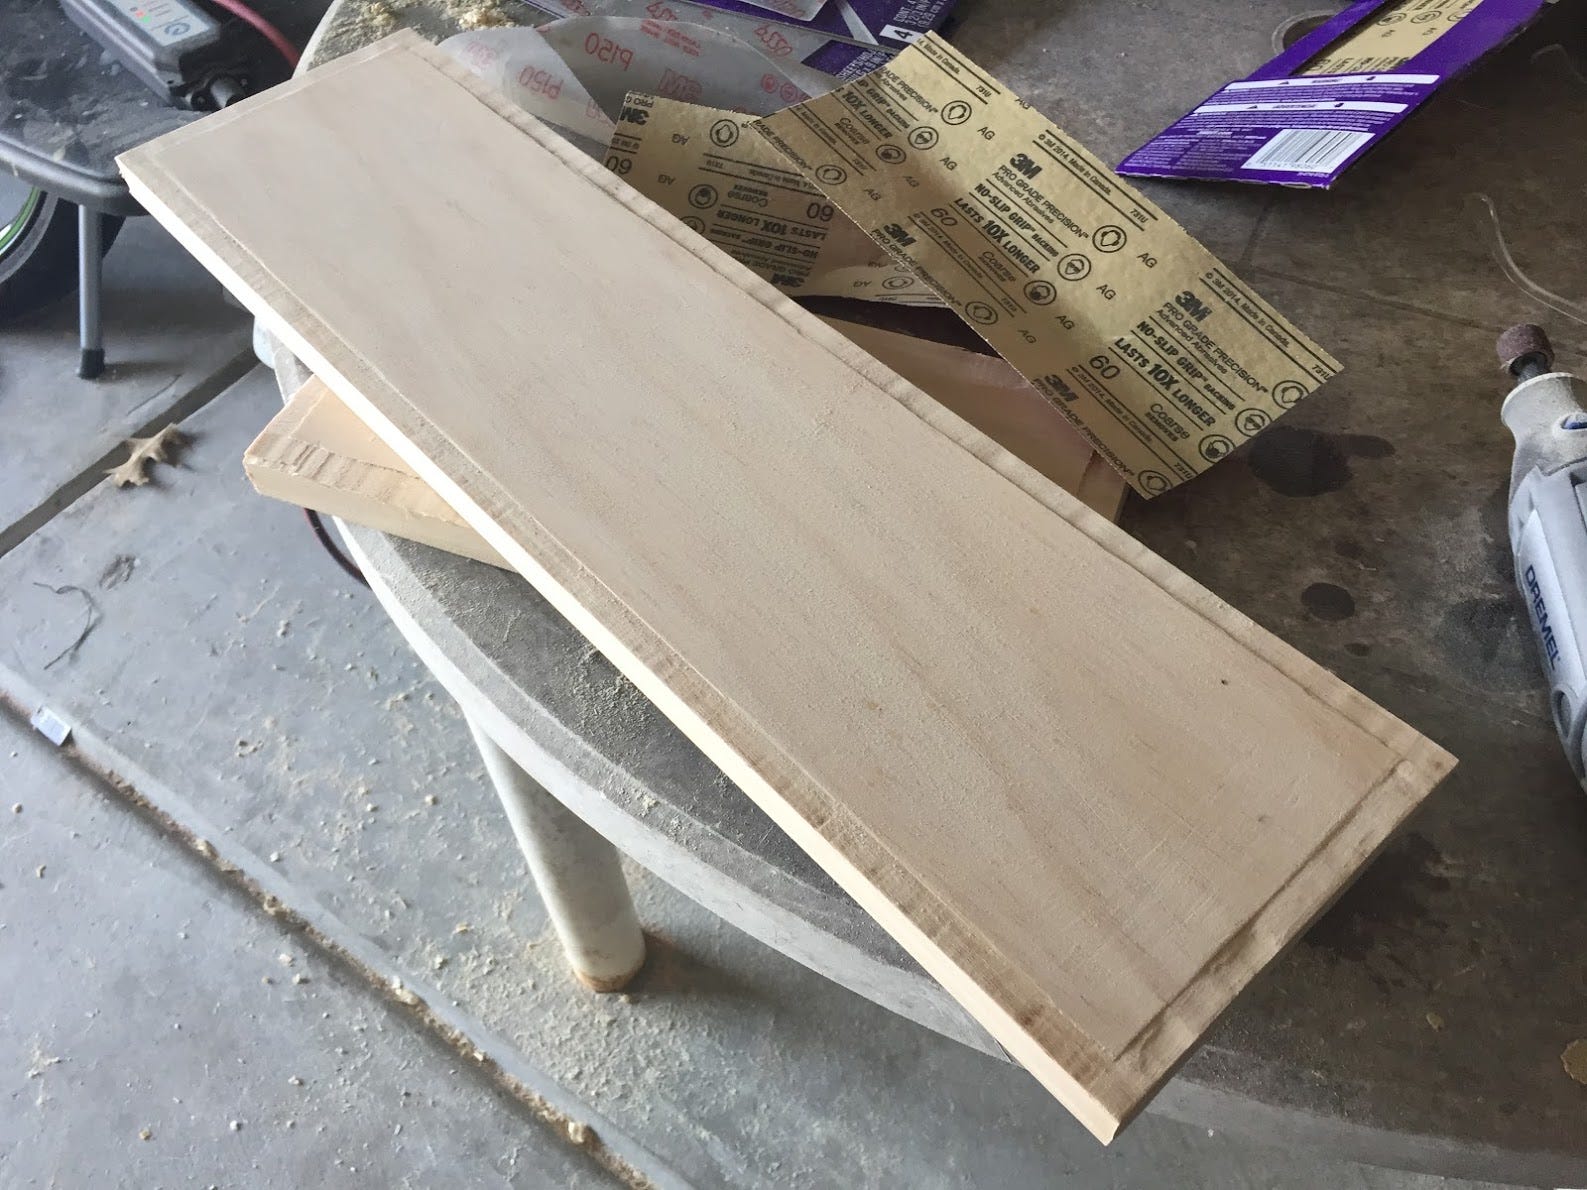
I was free handing it so it was difficult to get a straight even cut all the way across. If I had something to rest the dremel on to get that even cut, it would have come out better.
After cutting and sanding the base, I moved on to staining it with a lighter stain. Luckily the stain didn’t dry blotchy as it did for the commas.

I finished off by applying a layer of topcoat to the base as well.
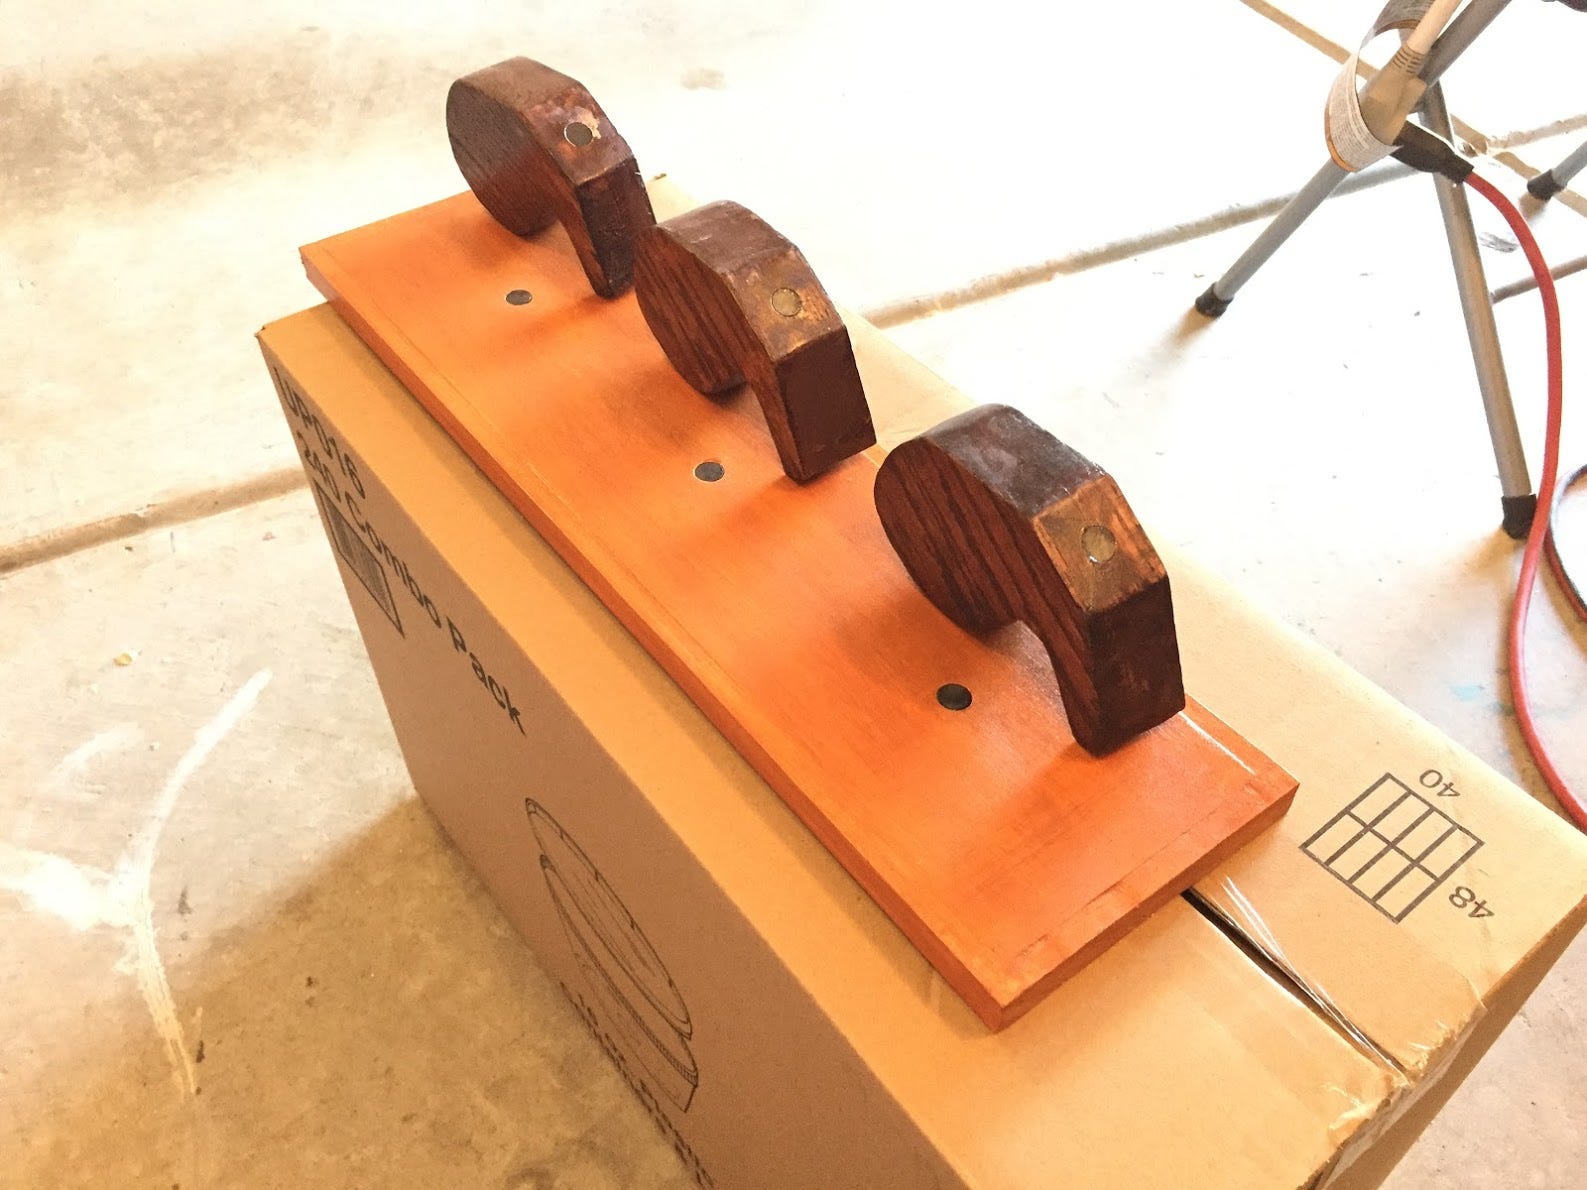
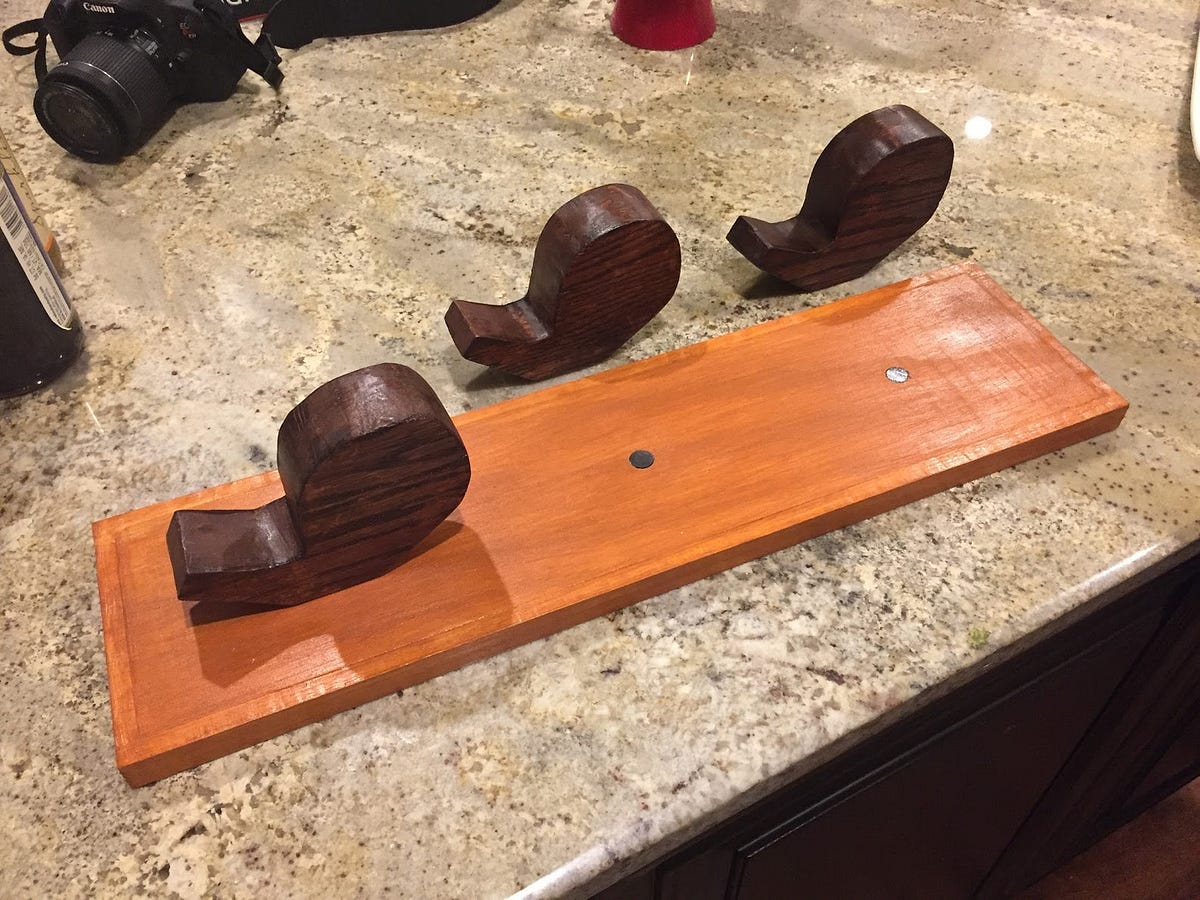
Sitting the Commas on the Base
Getting the commas to sit on the base on its own was difficult. The commas would roll over as the center of gravity was toward the right.
There are a few solutions to this but in the end I used 1in circular magnets on the bottom of the commas and on the base.

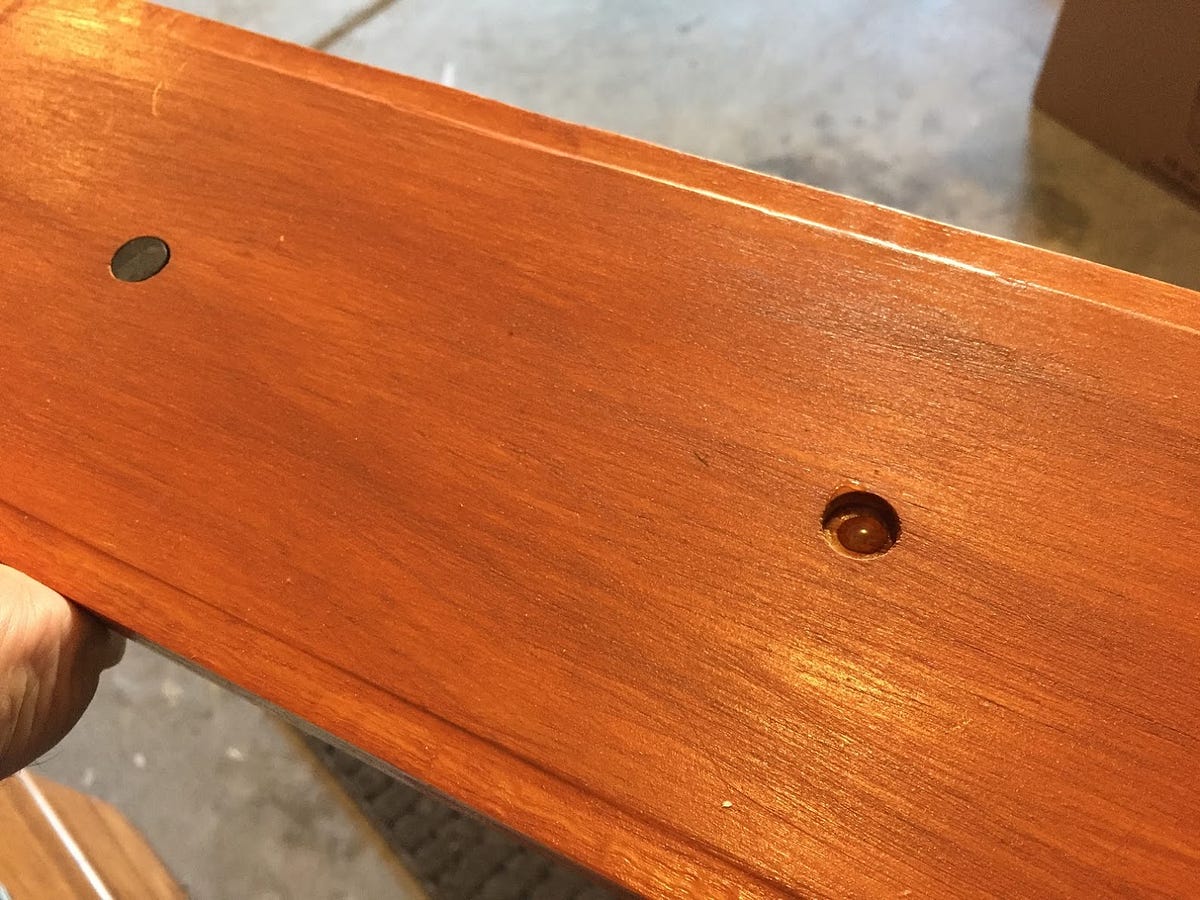
To fit the magnets, I had to drill holes using fornester bits on both the commas and base and used gorilla glue to glue the magnets inside the holes.
Like I mentioned, there are other solutions. One could secure the commas/base permanently by using screws/nails. However I wanted the commas to be removable and re-postionable. TK(fix word)
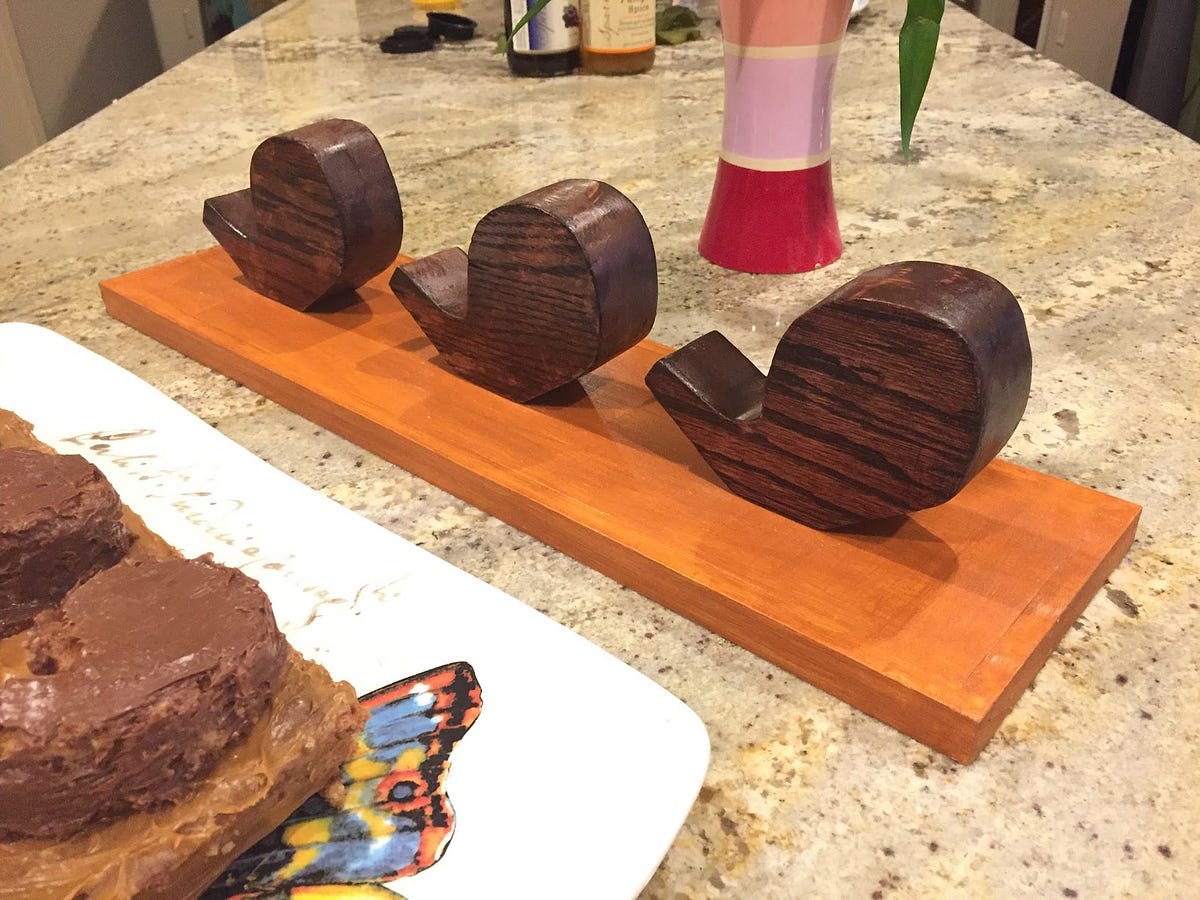
Finished Commas & Base
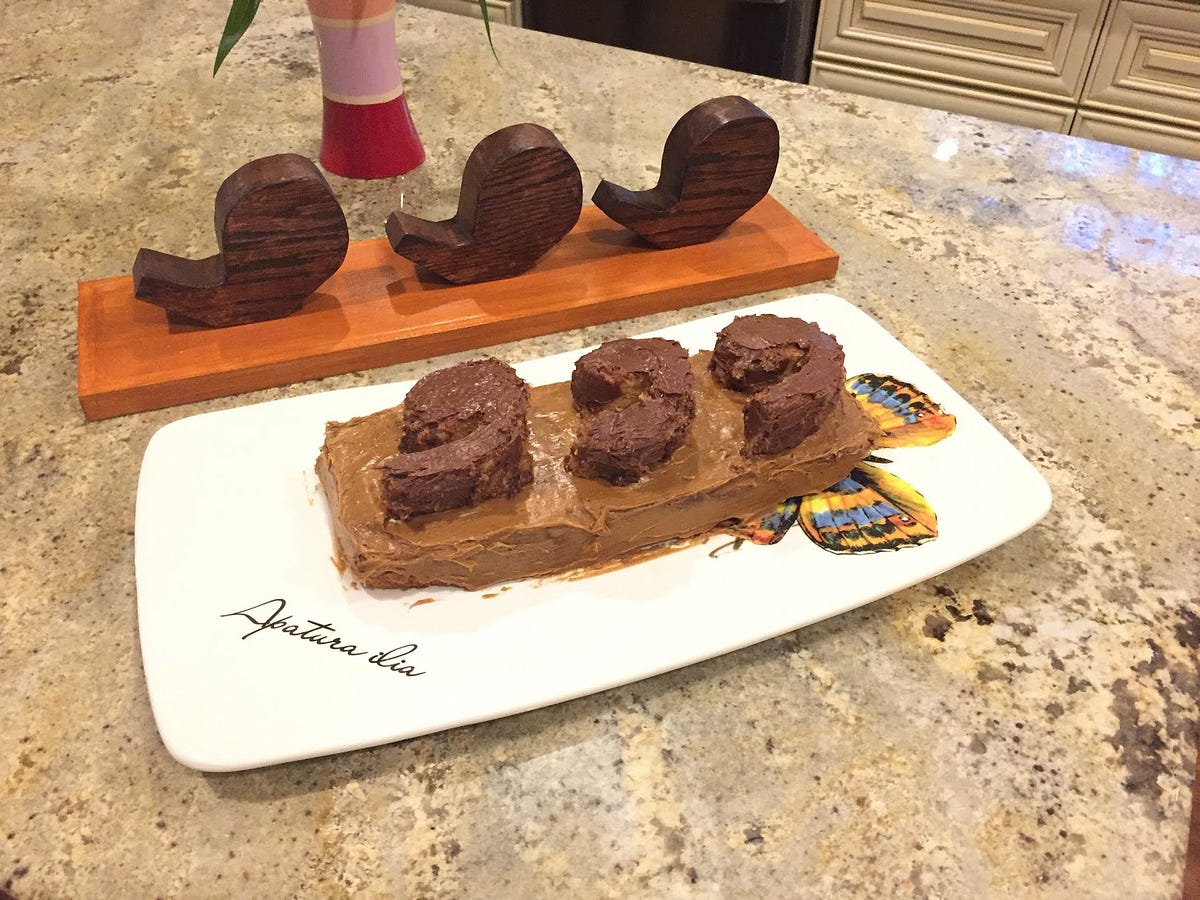
All in all, everything somehow came together. The magnets worked perfectly to hold the commas on the base. The stain showcased the grain beautifully (disregarding the blotchy areas). We also baked a three comma cake since this was for my sister’s birthday.
Materials
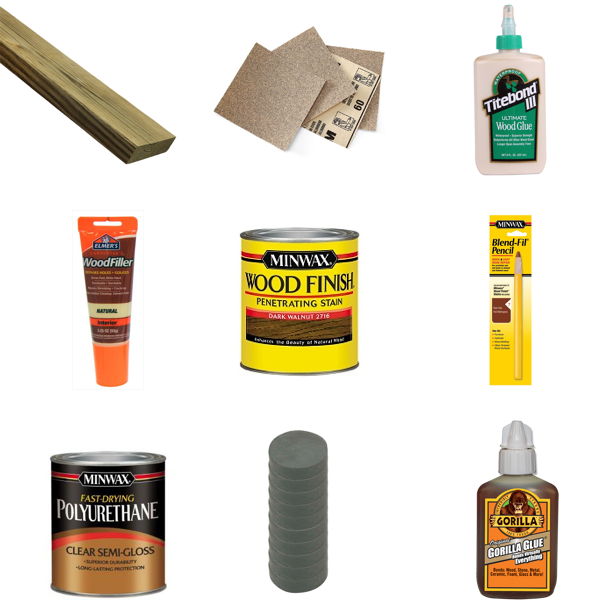
- Pine (Regular & Premium) and Oak
Used pine for practice. Moved on to premium pine and oak for the final object. - Sandpaper (60, 120, 220)
It’s recommended to start with a lower grit sandpaper and gradually move on to higher grits. - Wood Glue
My oak wood was 1 inches thick but I wanted my commas to be 2 inches. I ended up cutting two commas and glueing them together. - Wood Filler
Had to use wood filler to fill up mistakes while cutting. - Wood Stain
This is stain. Not sure what else can be said about stain. Make sure to use this in a well ventilated area. - Blend-Fil Pencil
The stain came out blotchy and patchy on two commas. Not sure why. The home depot guy recommended to use pre wood stain conditioner next time. The Blend-Fil Pencil is like a crayon on which you apply onto small imperfections. It didn’t work perfectly in my scenario. - Topcoat (Polyurethane, Semi-Gloss)
Top of the mornin to you lads. Finishes your wood. Adds a layer of protection and gloss. - Magnets (0.5 in diameter)
A magnet was placed on the bottom of the comma and on the base. This allows for the commas to stay upright. - Gorilla Glue
Gorilla glue was used to glue the magnet to the hole/base.
Tools
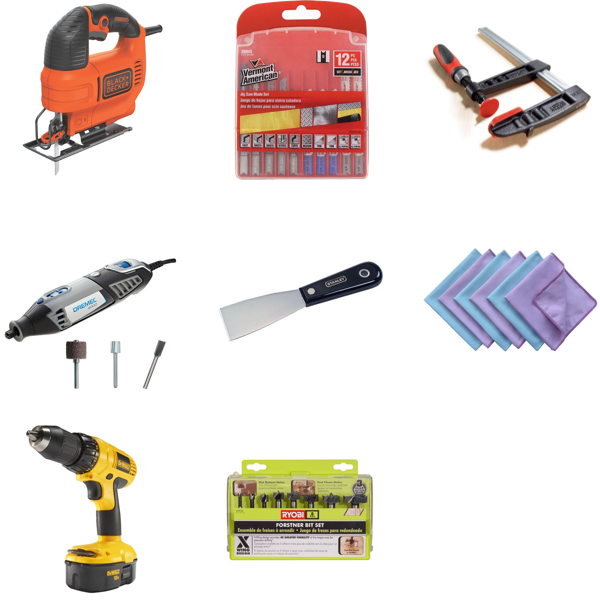
- Black and Decker Jigsaw
A cheap $30 jigsaw. Good for rough cuts on wood. - Additional Blades for the Jigsaw
The jigsaw comes with a blade however I had not known that there different types of blades for different functions (e.g. cutting on a curve or wanting a fine finish). So if you are looking to do any complex curved cuts, get the blade for curved cuts. I found this out a little late but it helped me tremendously! - Clamps
Again, not too much to say about clamps. Just make sure to get one to hold your wood in place while doing the cuts. - Dremel 4000 + Sanding, Carving, and Routing Bits
Good for finishes. However not for large jobs. I ended up sanding most of it by hand. Only the inside of the commas I sanded using the Dremel. - Putty Knife
Used this to apply the wood filler. You could also do this by hand but you will get a smooth application if you used this. - Lint Free Cloth/Old T-Shirt
This was to apply the wood stain and top coat. I just used an old t-shirt. - Power Drill
This was used in combination with the fornester bits. - Fornester Bits
The fornester bits were used to drill flat holes in the bottom of the comma and the base.
Shoutouts
A big shout out to…
@boland and @jmanweiler for giving me tips on how to get started!
@my dad: since I was home for the holidays, he helped out with creating the commas.
@my mom: for baking an amazing three comma cake
No comments:
Post a Comment